What is a MFP?
How do I set Windows 10 to run "Scan To Shared Folder"?
I want to run "Scan To Shared Folder" in Windows, how does it work?
How do I set "Scan To E-mail"?
What do I need to look at when looking for a printer or copier for my office?
How will I know the total cost of ownership of my printer?
Your multifunction printer can become a useful asset in managing and controlling costs for printing and imaging, and can also add new capabilities to your organization if you choose wisely. Consider how multifunction printers can address total cost of ownership for printing and imaging assets, better consolidate and improve management of resources across the organization, and improve business process efficiency. A MFP is designed for office use and functionality required in most businesses with ease of use and low running costs. Functionality out does any INK jet machine.
What should I consider when choosing the right vendor?
The more sophisticated multifunction printers let you not only manage fleets but also information. With the right tools built in, such as integration with Managed Print Services, your MFP becomes the hub of your document environment. It can automate business processes, optimize device management remotely, and assist your help desk with built-in tools. An app-connected interface opens a gateway of future possibilities for device, and document, management as well.
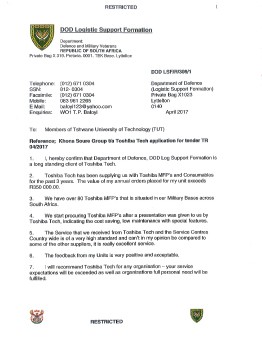
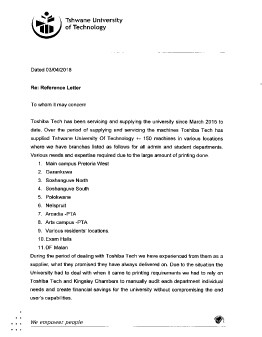
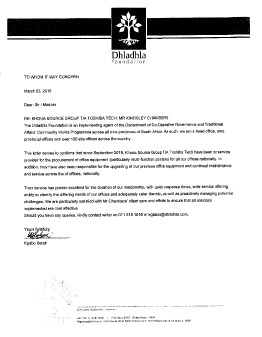
Look into the current support offerings and references that the Vendor should have. Go in depth and make sure you understand that its not just a sales pitch you are getting, but rather the after sales support you require for your business.
Make sure there are additional warranties in place and possible loan machines at no charge.
I am getting a "Toner Near Empty" message. Should I replace the toner cartridge?
A “Toner Near Empty” message signifies that the toner cartridge level is at 20%, replacing a toner cartridge before it is empty (0%) will trigger alert issues from the machine.
The “Toner Near Empty” alert was designed to act as a prompt for the end-user to organize replacement toner(s) from your Toshiba supplier from applications such as ECC CLOUD
Can I swap toner cartridges between same model devices?
Doing so can result in alert failures, as well as disrupt signals used for automatic toner ordering process in applications such as ECC CLOUD
How can I print from my Tablet or Smartphone?
e-BRIDGE Print and Capture App (iOS and Android)
This application is developed by Toshiba. It supports authentication, department codes, project code and various print options such as stapling. The application also integrates with Re-Rite (OCR software that runs on your server) to use OCR to output an editable or searchable format (DOCX, XLSX, Searchable PDF).
Files must be opened within the App to be printed. Printing from other applications such as an image viewer or web browser is not supported.
AirPrint (Apple iOS)
AirPrint is a mobile printing solution included with the Apple iOS v4.2 and later mobile operating systems. If you have a supported MFD Model AirPrint will need to be enabled to be discovered by your device.
Mopria (Android)
Mopria is a set of standards that enable printing from an Android mobile device to printers from different manufacturers or brands. The first execution of the standard has been for Google’s Android operating system (4.4 or later).
Mopria does not support some functions such as stapling, department codes or authentication. It has limited print options.
These printing options are only supported on the following models.
| Colour | Mono |
|---|---|
| e-STUDIO2500AC | e-STUDIO5008A |
| e-STUDIO2000AC | e-STUDIO4508A |
| e-STUDIO2500AC | e-STUDIO3508A |
| e-STUDIO4505AC | e-STUDIO3008A |
| e-STUDIO3505AC | e-STUDIO2508A |
| e-STUDIO3005AC | e-STUDIO2008A |
| e-STUDIO2505AC | e-STUDIO4508A |
| e-STUDIO5005AC | e-STUDIO3508A |
| e-STUDIO7506AC | e-STUDIO3008A |
| e-STUDIO6506AC | e-STUDIO2508A |
| e-STUDIO5506AC | e-STUDIO2008A |
| e-STUDIO407CS | e-STUDIO5008A |
| e-STUDIO347CS | e-STUDIO7508A |
| e-STUDIO2550C | e-STUDIO6508A |
| e-STUDIO2050C | e-STUDIO5508A |
| e-STUDIO5055C | e-STUDIO8508A |
| e-STUDIO4555C | e-STUDIO457 |
| e-STUDIO3555C | e-STUDIO357 |
| e-STUDIO3055C | e-STUDIO307 |
| e-STUDIO2555C | e-STUDIO257 |
| e-STUDIO5560C | e-STUDIO507 |
| e-STUDIO6570C | e-STUDIO477S |
| e-STUDIO6560C | e-STUDIO527S |
| e-STUDIO2051C | e-STUDIO307LP |
| e-STUDIO507 | |
| e-STUDIO457 | |
| e-STUDIO357 | |
| e-STUDIO307 | |
| e-STUDIO257 | |
| e-STUDIO507 | |
| e-STUDIO857 | |
| e-STUDIO757 | |
| e-STUDIO657 | |
| e-STUDIO557 | |
| e-STUDIO307LP |
When should I replace the toner cartridges on my device?
For instructions on how to replace toner cartridges, please refer to the User Guide specific to your device.
Important Note: Replacing a toner cartridge before it is empty (0%) will trigger alert issues from the machine causing incorrect readings in applications such as ECC CLOUD.
What is TopAccess?
There are two ways to open TopAccess:
– Web Browser
Type the MFD IP address into the Web Browser (Internet Explorer is recommended).
– From the Driver
The Universal drivers for Windows system have a link to TopAccess. Clicking the link will open TopAccess in the Windows system default browser.
Steps:
- Navigate to “Devices and Printers”
- Right click on the target MFD print queue and select “Printing Preferences”
- Click the “Others” tab
- Click the TopAccess Link
SCAN
How do I access the files scanned to the MFD local file share?
Finding the MFD IP Address:
- Enter ‘User Functions’
- Press the ‘Admin’ Tab
- Enter the password (default is 123456) and press OK
- Press ‘Network’
- Press ‘IPV4’
The IP address will be displayed.
Follow the instructions based on your operating system. In the examples, the MFD IP address used is 192.168.1.10. When following the steps, replace this with your MFD IP address
Windows:
- Click on ‘Start’ or the
- Type \192.168.1.10 and press ‘Enter’
- Double click on the folder called ‘file_share’ to access the files, or right click on the folder and select ‘map network drive’ to have a permanent link
Apple Mac OS X:
- Open ‘Finder’
- Click ‘Go’
- Select ‘Connect to Server…’
- Enter ‘smb://192.168.1.10/file_share’
- Press ‘Connect’ (click the ‘+’ to save it as a favourite server)
- The files stored on the MFD hard drive will be displayed
Why is there lines appearing on copies or scans when I use the Document Feeder?
Cleaning the slit glass with a lint-free cloth will resolve the issue of lines on copies or scans.
What do the scan to email error codes mean?
If the error code as a letter such as 2C14, the error is generated by the MFD and is usually displayed before the email has been sent.
SMTP Error Codes (MFD has successfully contacted the Mail server and the Mail server has returned an error code)
| Error Code | Meaning |
|---|---|
| 2500 | HOST NAME error: Destination mail address error |
| 2501 | HOST NAME error: Syntax error in parameters or arguments In TopAccess: Confirm that SMTP client is configured with a valid username and password. Confirm that TCP/IP Host name matches the DDNS host name |
| 2503 | Destination mail address error |
| 2504 | Destination mail address error This is a general error and the reason can vary. Some reasons are: - Authentication may be required. Enter authentication details or setup a relay on your Mail server - Authenticated user doesn’t have permission to send on behalf of the from address HOST NAME error : Command parameter not implemented In TopAccess: Confirm that host name in DDNS is correct |
| 2550 | Destination mail address error This is a general error and the reason can vary. Some reasons are: - Authentication may be required. Enter authentication details or setup a relay on your Mail server - Authenticated user doesn’t have permission to send on behalf of the from address - Mail server rejects emails that have come from an IP address is used in the “helo” string |
| 2551 | Destination mail address error SMTP authentication is required |
| 2552 | Terminal/Destination mail address error The email message exceeds the maximum size permitted. Change the setting on the mail server or try scanning at a lower resolution. |
| 2553 | Destination mail address error Confirm the email address is correct. Confirm the authentication settings are correct, or configure authentication |
MFD Scan to Email error codes
| Error Code | Meaning |
|---|---|
| 2C6C | Invalid address Confirm the email address is correct. Try adding it to the address book first and then select it when scanning. |
| 2C66 | Server Timeout Error. Confirm DNS settings are correct and the DNS function is working correctly. |
| 2C69 | Can’t connect to SMTP server Can't establish an SMTP connection with the entered address Confirm the Mail server settings are correct. If using the name of a mail server, ensure DNS settings have been configured through TopAccess. Confirm the Port setting is correct. |
| 2C71 | Failed SMTP Authentication Confirm the username and password configured for authentication is correct. Confirm the account used for authentication can send on behalf of the configured from address. |
| 2C10 | System Access Abnormality This can be caused by an incorrect network configuration – specifically the MTU. For further information, please contact your local Toshiba Dealer. |
How do I configure Scan to Email?
To configure scan to email you will need to know the settings for your Mail server such as:
- IP address
- Port
- The email address that emails will be sent from
- Credentials (username and password) to send using the email address if authentication is required.
Please refer to the guide on setting up Scan to Email using Gmail.
What is TOPACCESS?
There are two ways to open TopAccess:
– Web Browser
Type the MFD IP address into the Web Browser (Internet Explorer is recommended).
– From the Driver
The Universal drivers for Windows system have a link to TopAccess. Clicking the link will open TopAccess in the Windows system default browser.
Steps:
- Navigate to “Devices and Printers”
- Right click on the target MFD print queue and select “Printing Preferences”
- Click the “Others” tab
- Click the TopAccess Link
NETWORK
How do I access the files scanned to the MFD local file share?
Finding the MFD IP Address:
- Enter ‘User Functions’
- Press the ‘Admin’ Tab
- Enter the password (default is 123456) and press OK
- Press ‘Network’
- Press ‘IPV4’
The IP address will be displayed.
Follow the instructions based on your operating system. In the examples, the MFD IP address used is 192.168.1.10. When following the steps, replace this with your MFD IP address
Windows:
- Click on ‘Start’ or the
- Type \192.168.1.10 and press ‘Enter’
- Double click on the folder called ‘file_share’ to access the files, or right click on the folder and select ‘map network drive’ to have a permanent link
Apple Mac OS X:
- Open ‘Finder’
- Click ‘Go’
- Select ‘Connect to Server…’
- Enter ‘smb://192.168.1.10/file_share’
- Press ‘Connect’ (click the ‘+’ to save it as a favourite server)
- The files stored on the MFD hard drive will be displayed
How do I find the IP address of my MFD?
- Enter ‘User Functions’
- Press the ‘Admin’ Tab
- Enter the password (default is 123456) and press OK
- Press ‘Network’
- Press ‘IPV4’
- The IP address will be displayed.
How do I MFD address book?
Managing the Address Book from TopAccess:
- Open Internet Explorer
- Type the IP address of the MFD in the URL bar
- Click on ‘Registration’
- Click on ‘Address Book’
- Click ‘Add Address’ to create an entry or click on the text of an existing entry to modify it.
Managing the Address Book from Walkup:
- Press ‘User Functions’
- Press ‘Address’
To add an address:
- Press on a blank space to highlight it
- Press ‘Entry’
- Press on a section to enter data. Minimum information is ‘First name’ and ‘email’ or ‘fax’ or both
- Press ‘Ok’
To Edit an address:
- Select the address and press ‘edit’
The process may vary slightly based on the model of MFD
How can I print from my Tablet or Smartphone?
e-BRIDGE Print and Capture App (iOS and Android)
This application is developed by Toshiba. It supports authentication, department codes, project code and various print options such as stapling. The application also integrates with Re-Rite (OCR software that runs on your server) to use OCR to output an editable or searchable format (DOCX, XLSX, Searchable PDF).
Files must be opened within the App to be printed. Printing from other applications such as an image viewer or web browser is not supported.
AirPrint (Apple iOS)
AirPrint is a mobile printing solution included with the Apple iOS v4.2 and later mobile operating systems. If you have a supported MFD Model AirPrint will need to be enabled to be discovered by your device.
Mopria (Android)
Mopria is a set of standards that enable printing from an Android mobile device to printers from different manufacturers or brands. The first execution of the standard has been for Google’s Android operating system (4.4 or later).
Mopria does not support some functions such as stapling, department codes or authentication. It has limited print options.
These printing options are only supported on the following models.
| Colour | Mono |
|---|---|
| e-STUDIO2500AC | e-STUDIO5008A |
| e-STUDIO2000AC | e-STUDIO4508A |
| e-STUDIO2500AC | e-STUDIO3508A |
| e-STUDIO4505AC | e-STUDIO3008A |
| e-STUDIO3505AC | e-STUDIO2508A |
| e-STUDIO3005AC | e-STUDIO2008A |
| e-STUDIO2505AC | e-STUDIO4508A |
| e-STUDIO5005AC | e-STUDIO3508A |
| e-STUDIO7506AC | e-STUDIO3008A |
| e-STUDIO6506AC | e-STUDIO2508A |
| e-STUDIO5506AC | e-STUDIO2008A |
| e-STUDIO407CS | e-STUDIO5008A |
| e-STUDIO347CS | e-STUDIO7508A |
| e-STUDIO2550C | e-STUDIO6508A |
| e-STUDIO2050C | e-STUDIO5508A |
| e-STUDIO5055C | e-STUDIO8508A |
| e-STUDIO4555C | e-STUDIO457 |
| e-STUDIO3555C | e-STUDIO357 |
| e-STUDIO3055C | e-STUDIO307 |
| e-STUDIO2555C | e-STUDIO257 |
| e-STUDIO5560C | e-STUDIO507 |
| e-STUDIO6570C | e-STUDIO477S |
| e-STUDIO6560C | e-STUDIO527S |
| e-STUDIO2051C | e-STUDIO307LP |
| e-STUDIO507 | |
| e-STUDIO457 | |
| e-STUDIO357 | |
| e-STUDIO307 | |
| e-STUDIO257 | |
| e-STUDIO507 | |
| e-STUDIO857 | |
| e-STUDIO757 | |
| e-STUDIO657 | |
| e-STUDIO557 | |
| e-STUDIO307LP |
What is the default password for my device?
On some printers, the password will be ‘aaaaaa’.
If either of these passwords don’t, work it means that it has been changed and you should contact your IT support or your local Toshiba dealer.
What is TopAccess?
There are two ways to open TopAccess:
– Web Browser
Type the MFP IP Address into the Web Browser (Internet Explorer is recommended).
– From the Driver
The Universal drivers for Windows system have a link to TopAccess. Clicking the link will open TopAccess in the Windows system default browser.
Steps:
- Navigate to “Devices and Printers”
- Right click on the target MFD print queue and select “Printing Preferences”
- Click the “Others” tab
- Click the TopAccess Link
COPY
I am getting a "Toner Near Empty" message. Should I replace the toner cartridge?
A “Toner Near Empty” message signifies that the toner cartridge level is at 20%, replacing a toner cartridge before it is empty (0%) will trigger alert issues from the machine.
The “Toner Near Empty” alert was designed to act as a prompt for the end-user to organize replacement toner(s) from your Toshiba supplier from applications such as ECC CLOUD.
Why is there lines appearing on copies or scans when I use the Document Feeder?
Cleaning the slit glass with a lint-free cloth will resolve the issue of lines on copies or scans.
Can I swap toner cartridges between same model devices?
Doing so can result in alert failures, as well as disrupt signals used for automatic toner ordering process in applications such as ECC CLOUD.
Where can I find the specifications of my MFD?
When should I replace the toner cartridges on my device?
For instructions on how to replace toner cartridges, please refer to the User Guide specific to your device.
How can I get notified of events on the MFD?
TopAccess Device screen
When navigating to TopAccess the Device information is displayed. If authentication is turned on, this is displayed after logging in.
This page gives a snapshot of the device, such as:
- Network information (Serial Number, MAC address, Model etc)
- Installed options (Finisher, Hole punch, Fax)
- Toner Levels
- Drawer configuration and remaining paper levels
Any messages, such as Toner low, waste toner cartridge needs replacing, paper empty will be displayed on this screen.
Email Notifications
- Notifications can be configured for certain events, such as:
- Drawer out of paper
- Door/drawer open
- Waste toner container full
- Toner Empty
- Paper Jam
- Received Fax
For this function to work, the “Scan to email” function must be setup and working. Instructions on setting this up can be found here.
To setup Email notifications:
- Open Internet Explorer
- Type the IP address of the MFD in the URL bar
- Click on ‘Administration’
- Enter the username and password (Admin / 123456)
- Click on ‘Maintenance’
- Click on ‘ Notification’
- Under Email Setting, select the check box next to “Notify Administrator at Email Address 1” and enter the email address
- Select the items to receive notifications for
- Click Save
What do the scan to email error codes mean?
If the error code as a letter such as 2C14, the error is generated by the MFD and is usually displayed before the email has been sent.
SMTP Error Codes (MFD has successfully contacted the Mail server and the Mail server has returned an error code)
| Error Code | Meaning |
|---|---|
| 2500 | HOST NAME error: Destination mail address error |
| 2501 | HOST NAME error: Syntax error in parameters or arguments In TopAccess: Confirm that SMTP client is configured with a valid username and password. Confirm that TCP/IP Host name matches the DDNS host name |
| 2503 | Destination mail address error |
| 2504 | HOST NAME error: Command parameter not implemented In TopAccess: Confirm that host name in DDNS is correct |
| 2550 | Destination mail address error This is a general error and the reason can vary. Some reasons are: - Authentication may be required. Enter authentication details or setup a relay on your Mail server - Authenticated user doesn’t have permission to send on behalf of the from address - Mail server rejects emails that have come from an IP address is used in the “helo” string |
| 2551 | Destination mail address error SMTP authentication is required |
| 2552 | Terminal/Destination mail address error The email message exceeds the maximum size permitted. Change the setting on the mail server or try scanning at a lower resolution. |
| 2553 | Destination mail address error Confirm the email address is correct. Confirm the authentication settings are correct, or configure authentication |
MFD Scan to Email error codes
| Error Code | Meaning |
|---|---|
| 2C6C | Invalid address Confirm the email address is correct. Try adding it to the address book first and then select it when scanning. |
| 2C66 | Server Timeout Error. Confirm DNS settings are correct and the DNS function is working correctly. |
| 2C69 | Can’t connect to SMTP server Can't establish an SMTP connection with the entered address Confirm the Mail server settings are correct. If using the name of a mail server, ensure DNS settings have been configured through TopAccess. Confirm the Port setting is correct. |
| 2C71 | Failed SMTP Authentication Confirm the username and password configured for authentication is correct. Confirm the account used for authentication can send on behalf of the configured from address. |
| 2C10 | System Access Abnormality This can be caused by an incorrect network configuration – specifically the MTU. For further information, please contact your local Toshiba Dealer. |
How do I configure Scan to Email?
Scan to email is configured through TopAccess.
- To configure scan to email you will need to know the settings for your Mail server such as:
- IP address
- Port
- The email address that emails will be sent from
- Credentials (username and password) to send using the email address if authentication is required.
- Please refer to the guide on setting up Scan to Email using Gmail.
ADMIN
How do I clear a message on the MFD screen?
What does "Call for Service" with a CD70 or CD71 message mean?
How do I find the IP address of my MFD?
- Enter ‘User Functions’
- Press the ‘Admin’ Tab
- Enter the password (default is 123456) and press OK
- Press ‘Network’
- Press ‘IPV4’
- The IP address will be displayed.
How do I manage the MFD address book?
Managing the Address Book from TopAccess:
- Open Internet Explorer
- Type the IP address of the MFD in the URL bar
- Click on ‘Registration’
- Click on ‘Address Book’
- Click ‘Add Address’ to create an entry or click on the text of an existing entry to modify it.
Managing the Address Book from Walkup:
- Press ‘User Functions’
- Press ‘Address’
To add an address:
- Press on a blank space to highlight it
- Press ‘Entry’
- Press on a section to enter data. Minimum information is ‘First name’ and ‘email’ or ‘fax’ or both
- Press ‘Ok’
To Edit an address:
- Select the address and press ‘edit’
- The process may vary slightly based on the model of MFD
Why does my MFD say 'Interrupt' when there are no jobs waiting?
What should I do when my MFD displays "Call for Service"?
How can I get notified of events on the MFD?
TopAccess Device screen
When navigating to TopAccess the Device information is displayed. If authentication is turned on, this is displayed after logging in.
This page gives a snapshot of the device, such as:
- Network information (Serial Number, MAC address, Model etc)
- Installed options (Finisher, Hole punch, Fax)
- Toner Levels
- Drawer configuration and remaining paper levels
Any messages, such as Toner low, waste toner cartridge needs replacing, paper empty will be displayed on this screen.
Email Notifications
Notifications can be configured for certain events, such as:
- Drawer out of paper
- Door/drawer open
- Waste toner container full
- Toner Empty
- Paper Jam
- Received Fax
For this function to work, the “Scan to email” function must be setup and working. Instructions on setting this up can be found here.
To setup Email notifications:
- Open Internet Explorer
- Type the IP address of the MFD in the URL bar
- Click on ‘Administration’
- Enter the username and password (Admin / 123456)
- Click on ‘Maintenance’
- Click on ‘ Notification’
- Under Email Setting, select the checkbox next to “Notify Administrator at Email Address 1” and enter the email address
- Select the items to receive notifications for
- Click Save
References